Saturday, August 27, 2016

Student Birthdays!

Welcome back to school, y'all!  Have you gone back yet?  My district started on the 22nd this year.  This is a big year for me because I finally get to take my OWN babies with me to school!  We are starting Kindergarten, y'all!  
Thomas Teachable Moments
If you are like me, or any other teacher at this moment in the year, you have a running list of about 1,000 items you wanted to get done before school started!  

Well, I don't know about you, but one of the first things that I always do before the year begins is get my students' birthday gifts ready.  It may seem like jumping the gun, but birthdays have always been a really important day in my family, so I try to make sure I am prepared to make each child's day special!  
How do I do this for 22 children, headache-free?  Here are the five steps of what I do once I finally get that coveted, finalized, class list!

1.       Write down each child's birthday on my calendar and/or planner
·      This helps me make sure that it is on my radar!  If I only have it on my birthday calendar in my classroom, I WILL forget - I just don't look at it.  It's more for the kids. 
Thomas Teachable MomentsThomas Teachable Moments

2.      Put them in a list in order by date
·      This helps me see at a glance who we have celebrated and who is coming up.  It also helps me to not leave out the summer birthday kids and kids who have birthdays over holiday breaks.  It's easier to remember the birthdays of kids who have a birthday during the school year when we are in class.  My own twins (Emily and Ben) have summer birthdays, so I am always cognizant of these kiddos!  My Erin Condren planner has a special place for it, but you could do it anywhere! 
Thomas Teachable Moments
3.      Determine the gift
·      It can be the same thing for each of them, or one thing for boys, and one thing for girls, or you can even do different things for each of them.  I find, it's better to do the same thing at my kids' age because they don't do well when anyone gets something different than they do!  :)

4.      Prepare the gifts BEFORE school begins
·      This is the MOST important step!! If I take the time to get everything ready before the rush of school begins, then I won't have one of those panicky moments or be caught in a bind with no gift!  It's awfully hard to tell a child, "I'm so sorry - your birthday snuck up on me and I don't have anything for you today!"

Also, the maximum number of students I can have is 22, so I always prepare 22. I'd rather have too many prepared than not enough.  It's SUCH a pain to have to have to gather everything up and try to make one gift for a new student when I could've knocked it out at the beginning of the year with all the others.

5.      Put them on display, or in an easily accessible place.
·      If your gifts are cutesy, then use them as part of your classroom decor so the kids can see them and be excited to receive their gifts on their special day.  If you'd rather it be more of a surprise, or don't have room to display them, just make sure that you put them somewhere that is easy to get to, AND a place where you won't forget!
Thomas Teachable Moments

Here's what I made this year!  
Thomas Teachable Moments
I made birthday cups filled with candy and made them look like little milkshakes with a cherry on top - because who doesn't like THAT?!  It was really pretty easy and I can't wait to give them to the kids!

I went to my local Starbucks and asked the barista if I could buy some of their plastic cups with the dome lids.  She gave me sort of a strange look, but I told her I am a teacher and use these for my students' birthday gifts.  They were so kind and gave me a set of cups and lids.  Thank you, Starbucks!


Supplies:
· acrylic paint (über cheap at Wal-Mart and Michaels)
· stickers
· candy (or filling of your choice)
· one-hole punch
· pencils
· something to use as the cherry on top
  
Directions:
1. paint each cup
2. place stickers on cup
3. fill cups with goodies
4. punch a hole in each lid
5. put a pencil in each punched hole of the lids
6. put the white crinkle paper in the lid and place on cup 
7. put the “cherry” on top


Thomas Teachable Moments

Thomas Teachable Moments

Thomas Teachable Moments

Thomas Teachable Moments

Thomas Teachable Moments

Monday, August 15, 2016

Thomas' Top 5 Classroom Management Tips and Tricks!

Welcome back to school, y'all!  And welcome to the blog hop!  I hope you will use some of the tips I am going to share with you! I am teaming up with 50 great teachers to bring you tried and true classroom management and organizational strategies that work in our classrooms.  We are also hosting a giveaway to win a $50 TpT Gift Card!  You can also win great classroom resources from over 30 teacher-authors.
Please make sure that you hop to each participating blog by clicking the apple at the bottom of each post.
Thomas Teachable Moments
Have you gone back yet?  My district starts on the 22nd this year.  This is a special year for me because I finally get to take my OWN babies with me to school!  We are starting Kindergarten, y'all!  
I thought I'd start the school year off by sharing some of my top five, tried and true, favorite classroom management secrets I use in my classroom every single year!  
I don't know about you, but I am ALWAYS looking for ways to simplify - the work smarter, not harder mentality.
Thomas Teachable Moments
So, without further ado, here is my list (in no particular order):

Thomas' Top 6
Classroom Management Tips and Tricks:

1.  Never Ever, Ever Run Out of Tissue Again...EVER!
This is one of those mythical things you have heard about in school, but it's never happened directly to YOU!  I kid you not, in all my years of teaching, I have never ONCE run out of tissue, or even come close in EIGHT YEARS.  I am the person that can always lend you a box.  
How do I do it?  Each student has their OWN box of tissue in his or her locker.
See it hiding in this picture at the bottom of the locker?
Mrs. Thomas' Teachable Moments
Once the kids think they are the owners of their own tissues, suddenly, it is less appealing to use them up.  They don't want to waste their OWN tissues!  That's it!  It’s the easiest trick ever.
And, I can assure you, the tissues DO fit in the lockers.  I have tiny lockers and they also keep their textbooks, backpacks, lunch boxes and coats in them just fine.

Do yourself a favor this year and try it out!  Let me know how many tissue boxes you have at the end of the year!  If you run out, I owe ya a coke!
Mrs. Thomas' Teachable Moments

2.  Numbered Text Books
Each year I assign my students a personal number.  This is their number for lining up and they put it on their papers so I can quickly put them in order.
I have found the answer to always knowing whose book is whose, and which person lost a text book.  A veteran teacher taught me this trick and I have used it every year that I’ve taught.
I print out a bunch of tags with my initial on the top, and their personal number on the bottom.  Then, I use clear packing tape, and tape it to the spine of the book.  I put one on every textbook in my room. 
When it is time to do textbook inventory, I don’t have to look at book numbers or hope the kids wrote their names in the books.  I know whose book is missing because I don’t have the book with his/her personal number. 
It also clears up confusion about whose book is whose when they all have their books out or are sharing.
Look in the picture above and you can see the labels!  Click HERE to download a file for your OWN textbook labels!

3.  Class List Tip:
I make miniature class lists and keep several of them on hand to use as a check off lists to see who has and has not turned something in.  I just type students’ names in alphabetical order and numbered. 
This is great for immediately seeing who has turned in picture money, beginning of year forms, homework, projects, behavior notes, returned report cards, etc.  
I simply thumb through what has been turned in and highlight their names!  Whoever is not highlighted is the one missing!  I paperclip it to the stack of papers or notes or money envelopes (whatever I am keeping track of) and voila!  Mayhem managed.
Click HERE to get a template to make your own miniature class lists!
Mrs. Thomas' Teachable Moments
4.  Pre-made I Can Statements:
Thomas Teachable Moments
Anyone else's district make you post your objectives for each subject?  Being in 2nd grade, I am self-contained, which means I teach all content areas. That's a LOT of objectives to write for one day!  
So, I created these SUPER convenient objectives that hang on binder rings.  I simply flip to the correct standard (listed in the bottom corner of each page) for each lesson of the day.  No more writing until my hand falls off!  Woo-hoo!  If you want to check them out, you can see them in my store by clicking here or the pictures below.

These I Can Statements have quickly become one of the most popular items in my store!
Mrs. Thomas' Teachable Moments

Mrs. Thomas' Teachable Moments

5.  Graded Work
Graded work is a two-way street for me. 
1.  I need my parents to feel consistently informed about their children’s grades.
2.  I need to know the children are showing them the work so we don't have any surprises at the end of the six weeks.  

I have learned the hard way that if I don't require parents to look at graded work consistently and have an opportunity to communicate with me about it, it can cause unease in our parent/teacher relationship.
Here is the BEST thing I do now that I wish I'd done as a first year teacher.
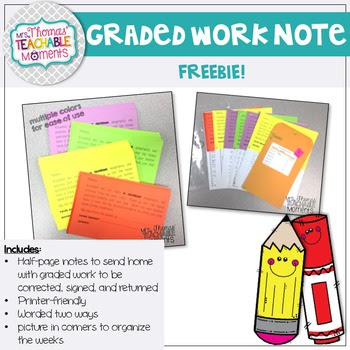
Each week, I put each child's set of graded papers in their own stack.  Then, I staple this handy-dandy note to the front of his/her work.  They are given a due date (usually 4 or 5 days) to give the packet of graded work to their parents.  The parent look over their children's work, have students make corrections at home if needed, note any questions they still have, and then sign and return the packet to me.

Mrs. Thomas' Teachable Moments
I then KEEP all of the signed and returned work in my filing cabinet for the grading period. 
When report cards come out, I take all of their work from the whole six weeks that has been signed and put it together in a baggie with their report card. (I usually choose a different color paper for each week to make it easy to see if each child is receiving back each set of graded work.)
Mrs. Thomas' Teachable Moments
If the parent still has a question about a report card grade, they can immediately look back through all of the graded papers for the whole grading period to see what the problem was.
After report cards, they keep the work and do what they want with it.  I just ask them to return the report card envelope and baggie so I can use it again the next grading period.
Genius, right?  I NEVER have issues with parents about confusion over students' grades.  It is ah-mazing.
You can grab this note for FREE in my store by clicking here or by clicking the pictures!  
Thomas Teachable Moments
Thanks for stopping by and reading my Top 6 Tips!  I hope you found something useful!  Be sure to enter the Rafflecopter to win a TpT Gift card!
Be sure to follow my blog by clicking the BlogLovin button on the right sidebar and get access to exclusive FREEBIES and other great classroom ideas!

Back 2 School Blog Hop TpT Gift Card Giveaway Rafflecopter Thomas Teachable Moments

a Rafflecopter giveaway